SDM Menus
To display the SDM menus, press your <ALT> button and then the MENU bottom.
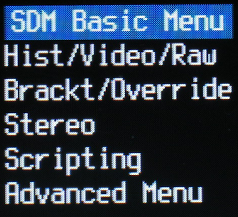
Most settings required for everyday use are in the Basic menu.
Less-used features are in the Advanced menu together with a limited number of features from the original CHDK.
Less-used CHDK features have been removed in order to provide a simplified and more compact menu system.
Some of the submenus use an RBF font named SDM.RBF.
In order that these may also be viewed when the menu orientation is vertical, they are limited to 15-character line-length.
This does not apply to the 'Advanced' menu options which should be used with horizontal orientation.

At top left of the screen (on all cameras that have a zoom lever), you will see the increment value that will be used when increasing or decreasing values in menus or script parameters.
Use the zoom lever to increase or decrease the increment by a factor of 10x.
Use the Up and Down buttons to navigate the menus and SET to enter a submenu or return to previous menu.
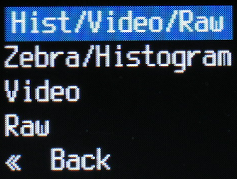
- Zebra overlay and various histograms may be displayed on shutter half-press.
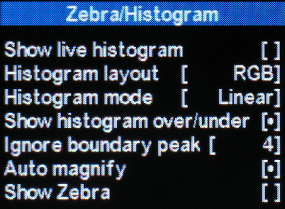 ..
..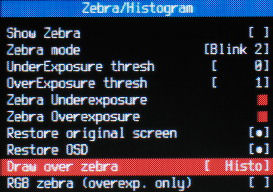 Set their parameters and display colours in these submenus.
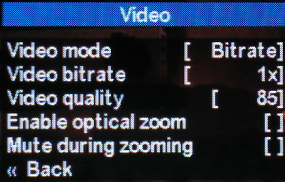
Video submenu allows setting of video quality/bitrate, the ability to zoom and muting sound on zoom.
Quality setting only affects the cameras that create MJPEG AVI files.
See 'Image and Video Capture'
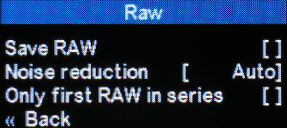
The RAW submenu provides settings for saving 10-bit or 12-bit RAW data plus a DNG header file and applying noise reduction.
Software tools are provided for Windows and are also available for the Mac to convert the RAW to standard DNG images.
They are in a format that allows easy uploading via USB using WIA-Loader.
Although minimal processing of the sensor RAW data is done on the camera, for fastest shooting speed you should use a newly-lowlevel-formatted fast memory card.
In single-shot mode, 'DNG' will be displayed in white characters.
Immediately after taking the shot, that will be briefly replaced by the raw saving time in msec, displayed in red (if Canon Review time is Off).
To save card space, you can select the 'Save blank JPG' option.
This creates a tiny image file, though raw processing time is slightly increased.
If 'DNG' is displayed in red, the camera is in continuous shooting mode and the stereo slit-camera is enabled in Advanced menu.
If 'DNG' is displayed in blue, the camera is in continuous shooting mode, the stereo slit-camera is enabled in Advanced menu and strip offset is '0' for streak-camera mode.
.
 ..
..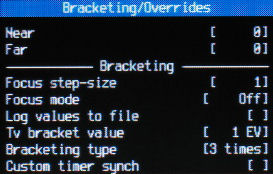
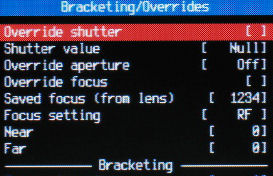
Overrides are applied to single images, bracketing to multiple images in continuous-shoot or timer mode.
See 'Image and Video Capture'
 ..
.. ..
.. ..
..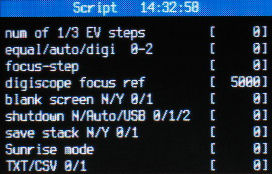
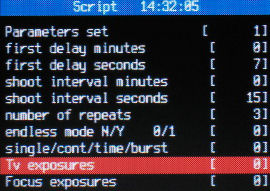
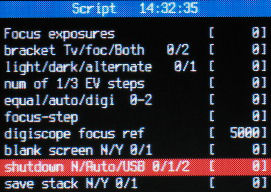
This submenu allows you to load a script from a file, set option to run it on start-up and set the script parameters.
For any script, you may save or load up to ten (0 to 9) sets of parameters.
They are saved in the PARAMS folder and are text files that may easily be edited with Notepad, Wordpad, etc.
Normally, USB download is disabled so that our remote switch does not make the camera enter Playback mode.
To download images directly from the camera to the computer, uncheck this option.
Alternatively, in playback <ALT> mode press the SET button until you hear a beep.
'UL' will be appended to 'image' or 'movie' text if image-uploading is enabled.
The time is displayed in order to assist testing of scripts that use the 'sleep_until' or 'start_time' commands.
For the Stereo submenu options, see Setting working parameters
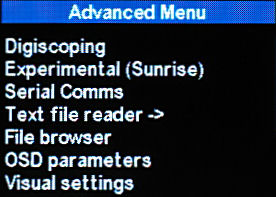
The number of Advanced Menu options have been minimised to the minimum required for most photography.
Use the Text file reader to view the SDM shortcuts listed in 'shortcut.txt' (in the TEXTS folder).
You may find it useful to add your own text files to that folder.
Further information in sections Digiscoping,Slit Camera, Experimental gradual exposure-change time-lapse and Serial Communication with an external device
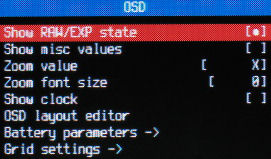
Option to display 'RAW' when RAW file saving has been enabled.
Option to display some miscellaneous values.
These are from original CHDK and include zoom position, aperture and focused distance.
Half-press shutter to update aperture value.
'Zoom value' allows you to set the displayed zoom value as real focal-length, 35mm-equivalent focal-length or zoom position.
A 24-hour clock may be displayed in HH:MM format.
The OSD layout editor allows you to position any of the displayed elements.
Use FuncSet to browse the elements and the arrow keys to position them.
In battery parameters you can set the high and low voltage levels to be used for the display 0% and 100% points.
'Grid settings' allows you to load various masks and grids useful for stereo and general photography.
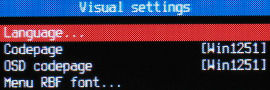
A number of languages are supported and you may also load the appropriate codepage.
The font normally used is 'SDM.rbf' but you may load alternatives.
If your current text seems small, try reloading font 'SDM.rbf'.
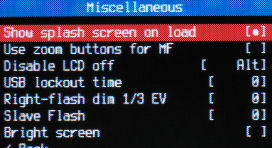
If the splash screen bothers you, disable it here.
In certain modes, depending on the camera, the focus may be overriden.
In such modes, you can optionally use the zoom button for focusing.
It is often desirable to prevent the LCD screen from turning-off.
You have the option of enabling this in <ALT> mode, or when a script is running.
A useful tip when you are setting-up equipment is to press the <ALT> button to prevent the screen turning-off (if you have set that option).
'USB lockout time' disables the effect of a signal on the USB input for the set number of seconds.
This is useful when interfacing devices (such as wireless-doorbell receivers) that have a pulsed output.
Although not normal usage, the flash on the right camera may be dimmed by up to twelve 1/3EV units (four stops).
You must be in a mode that allows synch shooting with flash, a letter 'F' will be displayed in the header.
If dimmming is enabled, the 'F' in the header will flash.
'Slave Flash' mode disables preflash and allow three power levels of main flash.
You would normally try to use the lowest setting to trigger external flash units.
The main flash should be turned off except on cameras that have a pop-up flash.
'Bright Screen' is an aid for focusing in Manual mode under low-light conditions.
To brighten the screen, flash is enabled but not triggered when the photo is taken.
If enabled, 'B' in the header will flash at the usual position for flash status..
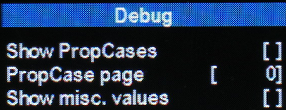
The debug features are intended to provide certain information when a user is reporting a problem.
Also located there (to make accidental use less likely) on cameras that support multiple partitions, is the option to swap partitions.
You need to do this to make the images 'visible' to some applications .
When you press, a beep acknowledgement will sound and the current partition will be indicated by number ('1' or '2') and background colour (green or blue).
'Reset Options' allows you to reset the menu options to their default values.