Looking Glass display by iPhone
i3DMovieMake Help Page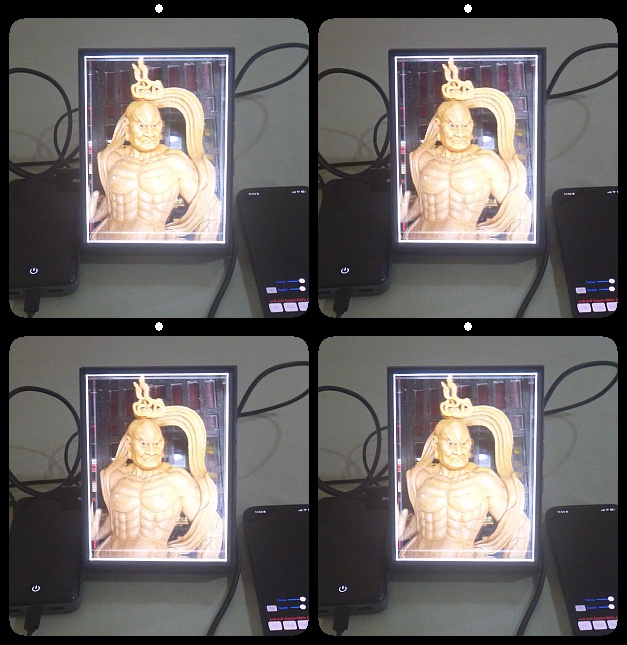
It is difficult to pass cinematic video to anyone other than the iPhone that shot it. As far as i have been able to confirm, cinematic video is not recognized as cinematic video unless it is sent via AirDrop or iCloud between cinematic-enabled devices. Also, even if you perform editing such as time crop, you will not be able to extract the depth.
If you save your cinematic video in RGB-D format, you can edit it, and even if it is not a cinematic-compatible device, you can convert it to 3D or display it stereoscopically on the Looking Glass with a USB-C iPad. For more details, please see this page.
Even if your device has a Lightning port, you can create and save a video/still
image for Looking Glass by reading the JSON file of the Looking Glass you
want to use, so you can use it in the stand-alone mode of Looking Glass
Portrait or display it from your PC.
If you want to try it out right away, please download and enjoy the RGB-D
sample movie from this page.
| How to use Looking Glass and this application |
| 1.In order to use Looking Glass, the calibration values of the Looking Glass to be used must be entered. For Looking Glass Portrait, you can access the Looking Glass Portrait drive when you connect to your PC. In that drive, you will find a file called "visual.json". For other models, after installing Looking Glass Bridge on the PC connected to Lookig Glass, open this page, press the "Save calibration from Bridge" button to obtain the calibration values and press the "Download contents of local storage as JSON file". Store this "visual.json" file in iCloud or local storage on the iPhone, and load it into the application using the following method. |
| 2.File -> Settings -> "JSON" button and open the pre-stored
"visual.json" file to import the necessary cabling values from
the file (see figure below). Of course, you can enter each value manually. After inputting calibration values, turn ON "Use Looking Glass". 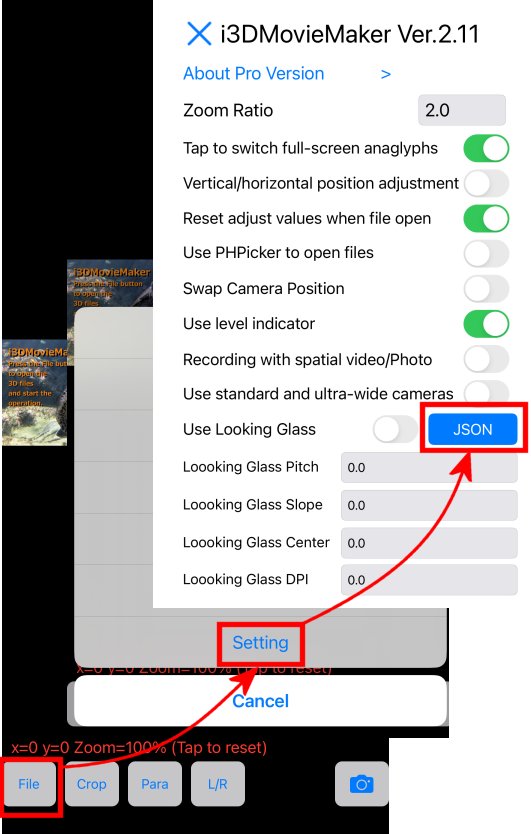 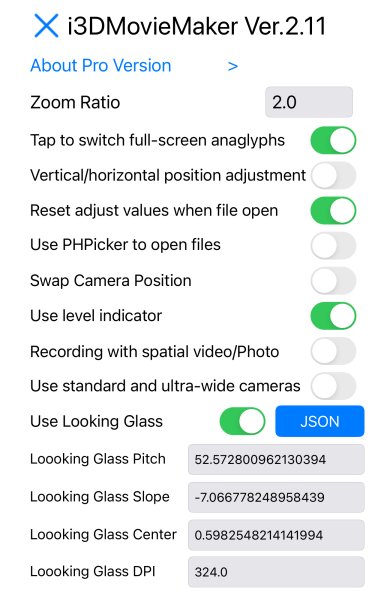 |
| 3.Connect the iPhone (iPad) and Looking Glass with a USB-C to HDMI adapter, etc., and confirm that the iPhone (iPad) screen is displayed as a clone on Looking Glass. It may take some time until the screen is displayed, but this function cannot be used unless the screen is displayed. Please check the connection problem and the resolution supported by the adapter. |
| 4.Portrait photos are in the "Portrait" album and cinematic videos are
in the "Cinematic" album, so open the appropriate file In the initial display mode (Para), the 2D image is displayed on the left and the depth map on the right. You can adjust the brightness with the slider below the image. For portrait photos, there is no need to touch the slider since the brightness is adjusted automatically. In the case of cinematic video, the brightness is set to the optimum value at the first frame, so adjusting the brightness with the slider is not necessary in most cases, However, if blackout or other problems occur depending on the scene, adjust the slider as necessary. 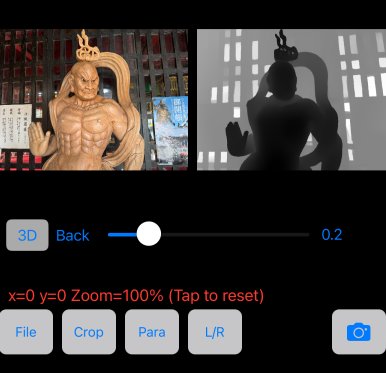 |
| 5.Press the "3D" button to display a 3D image on the Looking
Glass. Two sliders, "Focus" and "Depth" are displayed on the iPhone side. Use the "Focus" slider to adjust the focus position of the 3D object. The larger the value, the more the object will pop out in the foreground, but the larger the blur will be. The "Depth" slider adjusts the depth of the three-dimensional effect. The larger the value, the greater the depth, but the greater the distortion. Adjust to your liking. By swiping the iPhone screen to the right or left, you can switch between images in an album. 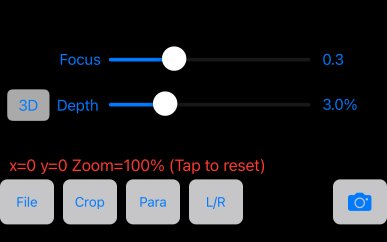  |
| 6.Youtube Video |