3D conversion capability for cinematic video/portrait photos
i3DMovieMake Help Page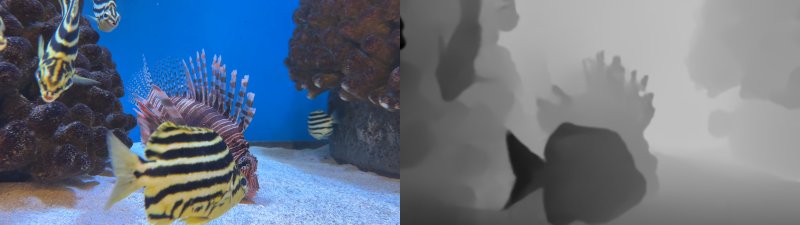
The iPhone's standard photo application has a portrait mode on many models,
which allows you to change the aperture and focus point later, creating
an impressive photo that focuses only on the subject and blurs the background,
as if you were shooting with a single-lens reflex camera with the aperture
wide open. This was further realized in video with the cinematic mode supported
by the iPhone 13Pro and later Pro models. Like portrait photography, cinematic
mode allows the photographer to freely set and edit the focus point for
each scene in the second part of the movie, creating an impressive, cinematic-like
movie.
To achieve these functions, portrait photos and cinematic videos are embedded
with a depth map (see above), which is a black-and-white luminance value
representing the depth information of the image, in addition to the original
image. Of course, standard photo applications and third-party applications
cannot see this depth map.
This application reads the depth map embedded in portrait photos and cinematic videos, and can convert and display 3D images from 2D image and the depth map (depth information) in real time. The converted 3D video can be converted to various 3D formats, croped, adjusted left and right positions, and saved. Of course, it is also possible to save the images as spatial video/photos.
Note that this application (i3DMovieMaker) is a free application, and the
above-mentioned depth readout and 3D conversion can be tried for free,
but in-app purchase is required to save the video. Once you pay, you can
use all the functions for the rest of the time.
It is difficult to pass cinematic video to anyone other than the iPhone
that shot it. As far as i have been able to confirm, cinematic video is
not recognized as cinematic video unless it is sent via AirDrop or iCloud
between cinematic-enabled devices. Also, even if you perform editing such
as time crop, you will not be able to extract the depth.
If you save your cinematic video in RGB-D format, you can edit it, and
even if it is not a cinematic-compatible device, you can convert it to
3D or display it stereoscopically on the Looking Glass with a USB-C iPad.
For more details, please see this page.
Problems with depth extraction from cinematic video
Videos that are time trimmed and newly saved in the standard Photos app
can be focus edited in the Photos app, but are not recognized as cinematic
video by the API. (Fixed in i3DMovieMaker Ver. 1.93 so that it does not
crash, but instead gives an error message)
Videos edited and saved with time cropping in the standard photo application
are not recognized as cinematic videos when the editing is applied. If
the original is used without reflecting the edit, it is recognized as cinematic
video. (i3DMovieMaker uses this method.)
The executable file created with the Apple source code to behaves exactly the same way.
So, if you want to use cinematic video with i3DMovieMaker, please use the original file shot with that iPhone.
| How to use the 3D conversion feature for cinematic video/portrait photos |
| 1.Standard camera have Portrait mode for portrait photos, and some models have Cinematic mode for cinematic video. (See figure below.) 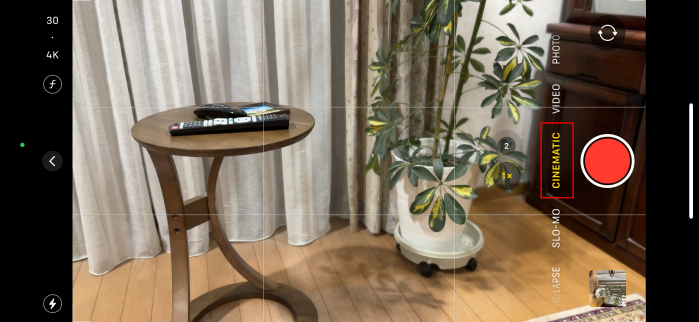 |
2.Start this application (i3DMovieMaker) and press the "File" button.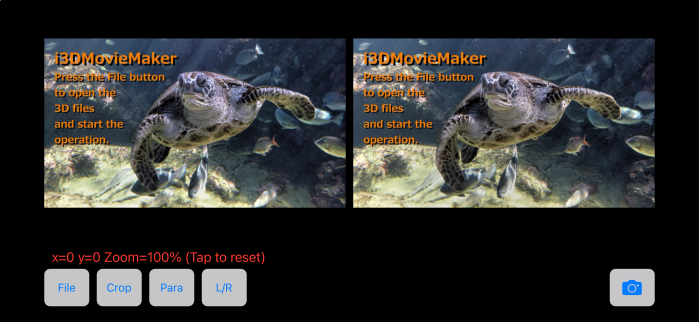 |
3.When the menu appears, select "Open media files".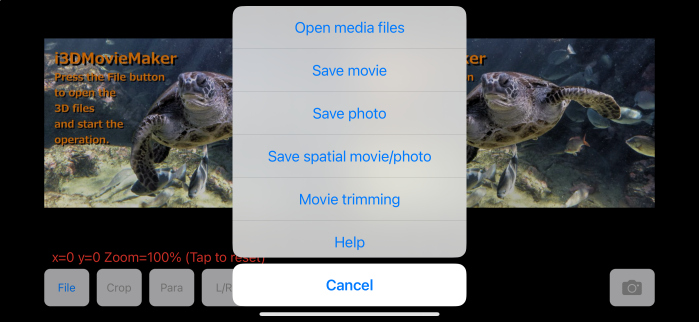 |
| 4.Album list will be displayed. Portrait photos go into the "Portrait" album and cinematic videos go into the "Cinematic" album. Here, the "Cinematic" album is selected 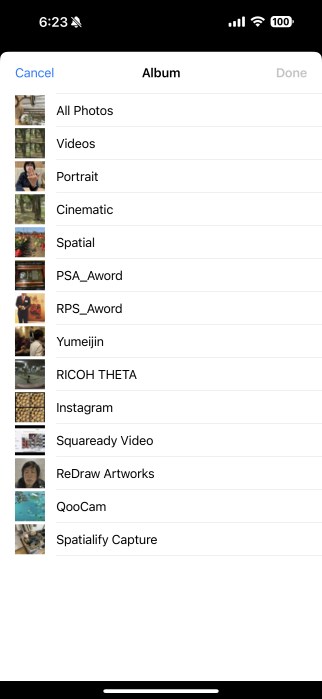 |
| 5. A cinematic video symbol will appear in the lower left corner of the
thumbnail image, indicating the video length (in seconds) and resolution. Select the file you wish to open and press "Done" in the upper right corner of the screen.  |
| 6. In the initial display mode (Para), the 2D image is shown on the left
and the depth map on the right. You can adjust the brightness with the slider below the image. In the case of portrait photos, the brightness is adjusted automatically, so there is no need to touch the slider. In the case of cinematic video, the brightness is set to the optimum value at the first frame, so adjusting the brightness with the slider is almost unnecessary. However, if blackout or other problems occur depending on the scene, adjust the slider as necessary. 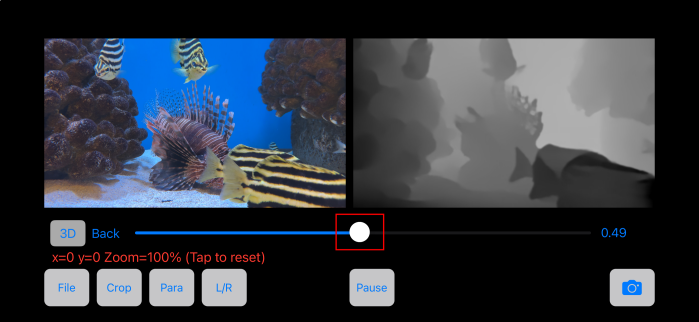 |
| 7. After adjusting the brightness of the depth map, press the "3D
button" to the left of the slider to convert the 3D image from the 2D image and the depth map (depth information) in real time. The slider change to different purpose: it becomes a slider for adjusting the parallax of the 3D image. The further to the right, the greater the parallax and the greater the stereoscopic effect, but the image are distorted, recommend setting it to about 3.0%. 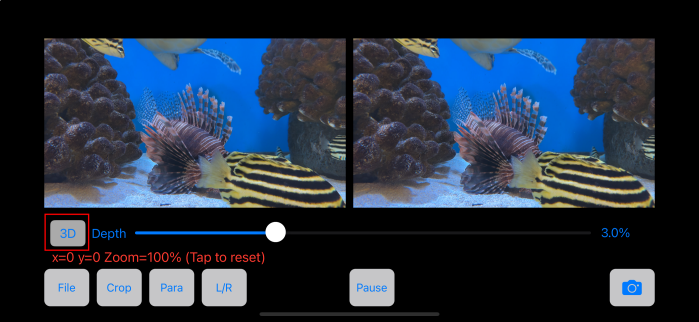 |
| 8. You can then edit and save the image as you would a normal 3D image.
The conversion process may result in distortions at the edges of the image, Please crop the image appropriately before use.  |
| 9. Select "Save Movie" from the File menu, and the following
setting window will appear for video. If you want to change the resolution of the saved video, turn on "Change saved video size", Specify the width of the saved video in pixels (the height is automatically calculated from the original aspect ratio). For photos, the settings screen will not be displayed and the original resolution will be saved. 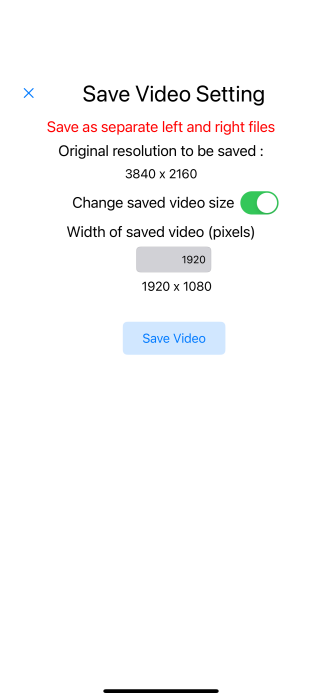 |
| 10.Youtube Video |