How to display Stereo Photography on Looking Glass

Sample Quilt image for caliburating the Looking Glass
lg_calibxx.jpg , keep this file in same folder. Required to Caliburate Looking Glass

StereoPhoto Maker Ver5.30
- SPM can read the calibration values from the Looking Glass via USB.
- Added Looking Glass position auto detect mode.
- Added 'Keep Aspect-ratio with border' option in each 'Create LKG image' dialogues.


By laminating special lens, called Lenticular Lens on LCD panel, we can send generated multi-viewing point image to device. We see stereoscopic image in front of screen, without 3D-glasses.
To obtain multi viewing image from R/L Stereo photography pair. We generate Depth map ( gray-scaled depth information image), then we can generate Multi view images from the Depthpmap.
Here, we show how to process as follow,
The benefits of displaying on Looking Glass directly from SPM are, not only we can confirm the generated multi-view image while process, but also that we can display without ultra fast GPU, if you have decent PC/Mac with 2560x1600 pixel external monitor option.
My MacBook Air (using Bootcamp to run Windows )has internal graphic chip (Intel HD Graphics 6000), cannot run official Looking Glass application, but SPM can handle without issue.

We show proceeding with menu selection, but many functions has been asigned to shortcut keys. we recommend using Shortcut Key for commonly used functions.

Preparation( only first time )

Perform Looking Glass Caliburation for SPM
Caliburating Looking Glass
If you cannot Caliburate well, there is an alternate option
There is Looking Glass Caliburator( Japanese ) by mer2.
It should be fine that you can type parameters from this Caliburator.

Even if you cannot calibrate perfectly, you can save multi-view image as Quilt format image. ( explained below )
Then, by running LookingGlassQuiltViewer, Quilt file generated by SPM will be viewable on Looking Glass

Generate Depth map from R/L Stereo Pair

please refer the link below
Generate Depth map from R/L Stereo Pair
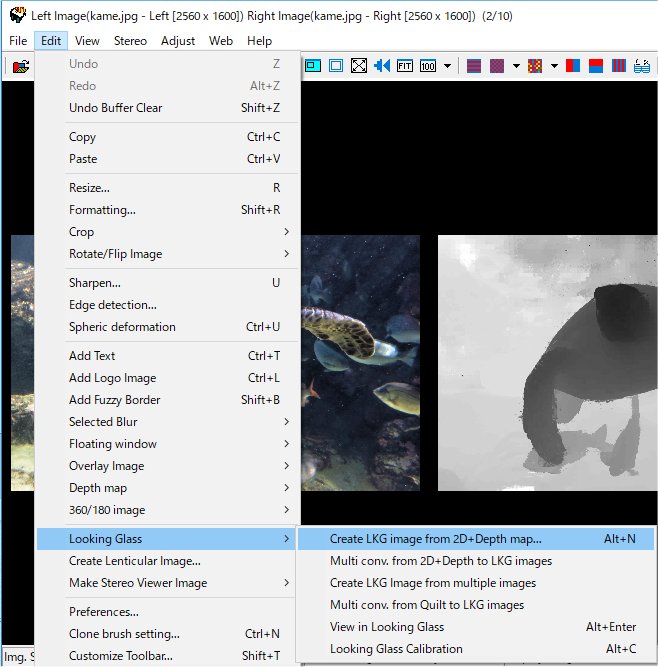
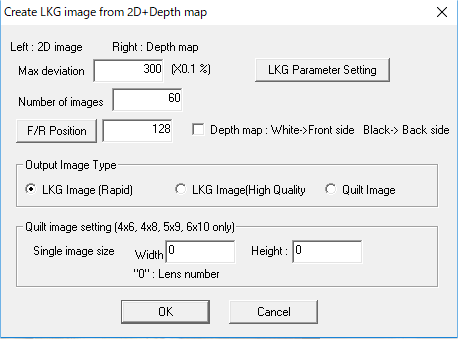
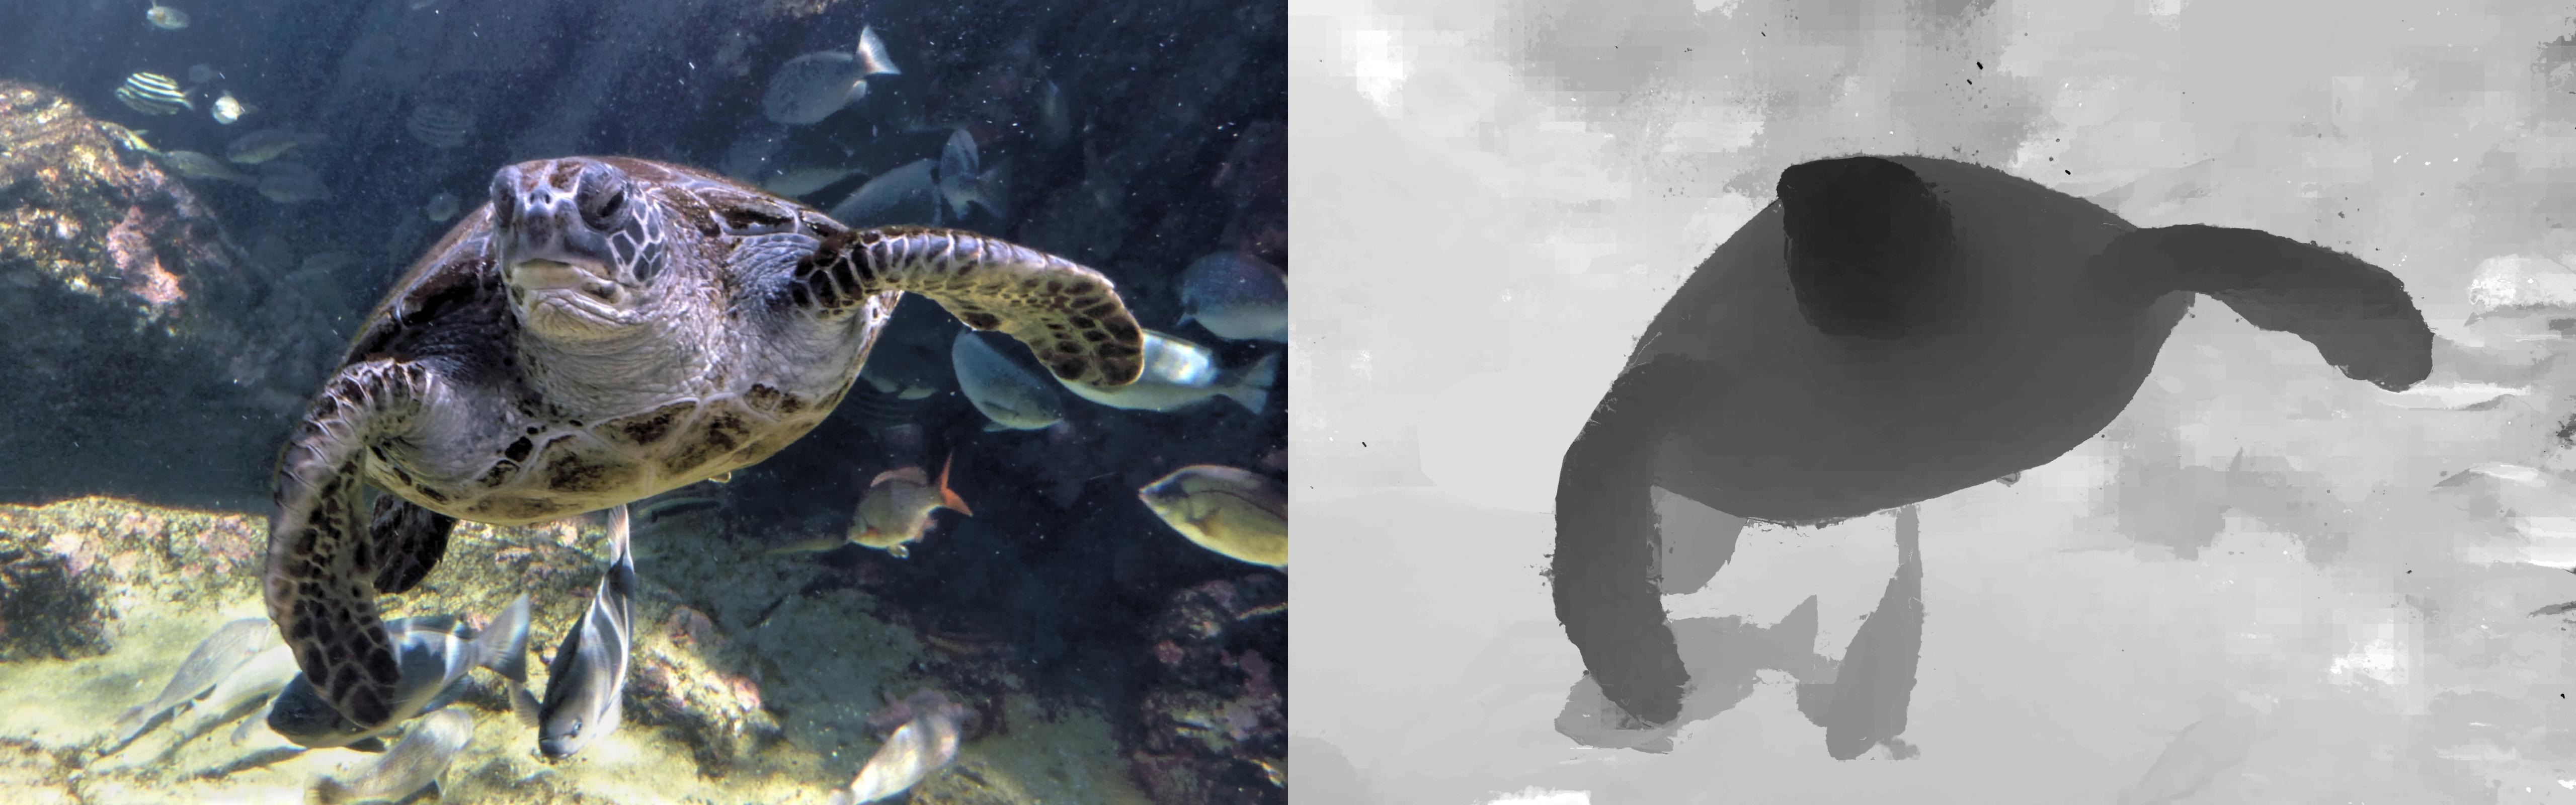
Once you have depth map, Place 2D image on left side, Depth map on right side
( Create Left/Right Depth map ) If you did not checked this option)
If you would like to correct, and clean up
Menu ⇒ Edit ⇒ Depth map ⇒ Correct depth map, opens Dialog box
Check [ activate Depth map correction ](to avoid accicental error, you cannot edit without check this box)
choose the color to paint over Depth map
Holding Ctrl key, By clicking right mouse button on where you wan to pick color, color will be updated to paint over.
, or you can enter number directly on Dialog box
Same manner as Clone Brush. By holding Ctrl key and drug mouse pointer, assigned color will be applied on Depth Map.
you can adjust Brush shape and size as you like.
Youtube video instruction ( Depth map correction )
Alternate method
Portrate Photo from Dual lens smart phone (Apple/Samsung/Motorola/Huawei) contains Depth map.
You will be able to extract Depthmap from them and use it.
Menu ⇒ Edit ⇒ Depth map ⇒ Open Jpeg include depth map, will open 2D image on left side、Depth map on Right side.
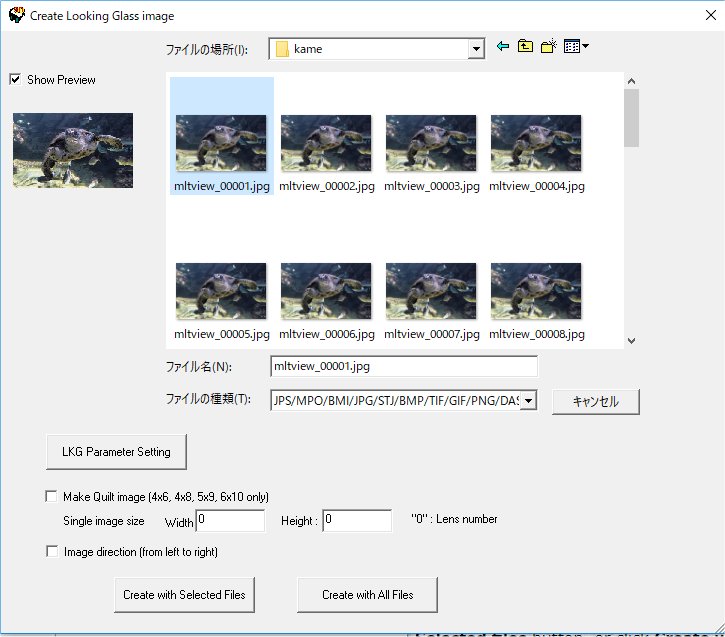
Sample image
If you want to try, please download these


Generate Looking Glass image from Depth map

Please place 2D image on left side, and Depth map on right side
You may adjust image ratio as, Menu ⇒ Edit ⇒ Crop ⇒ Free Crop Option..., We recommend cropping to 16:10 ratio, the same ratio as Looking Glass display

Max deviation: assign Right and Left horizontal parallax deviation.
We can say Normal Parallax is 3.0%(30), for Looking Glass, we suggest you to set about 10 times (300) for Max deviation
Entering greater Max Deviation, you gets depper depth, But, You may not get right image. Please run experiments by yourself to get best result.

Number of Images:Looking Glass recommends 60

F/R Position:set screen depth(0〜255)「F/R Position」You can extract selected depth density from Depth map by clicking this button,

Depth map: White>Front side Black>Back side : Check this only if your Depth map has been set white front. If wrong, you will get messy multiple image.

Output Image Type
LKG Image(Rapid):Speed priority, after done, Alt+Enter to display on Looking Glass. Enter to return
LKG Image(High Quality) :Quality Priority. take longer, but will bet better result, Specially on occlusion region, result will be better than Rapid process.
Quilt Image setting
Instead of make Looking Glass image, select this to generate tile style image ( Quilt Image )
Each Looking Glass depend on matched calibration parameter to make Looking Glass image.
Because of this, each image file is not always be displayed correctly on another device.
Quilt formatted file has no compatibility problem. For sharing on other devices, we recommend to save as Quilt format.
Size of Quilt file can be applied. Though you can assign them, image quality depends on the numbers of lenticular lens( about 356 lines ) on screen
Saving in larger size does not increase quality always. By setting width "0", SPM generate Quilt with lens numbers.
By setting Height "0", SPM calculates width sise automatically based on original image Width/Height ratio.

By skipping this option, we get cleaner direct LKG image, because it utilize all vertical pixels
(reminder, it has compatibility isse when you play on another Looking Glass device )
LKG Parameter setting : In default, you may not need to change settings if you has already calibrated. You can change if required


Generate Multiple images to Looking Glass image

Make Looking Glass image from multiple images :

Menu ⇒ Edit ⇒ Looking Glass⇒ Create LKG images from multiple images ..

move to directory folder where multiple images contained
Make Quilt image
Instead of make Looking Glass image, select this to generate tile style image ( Quilt Image ) from multiple images
Each Looking Glass depend on matched calibration parameter to make Looking Glass image.
Because of this, each image file is not always be displayed correctly on another device.
Quilt formatted file has no compatibility problem. For sharing on other devices, we recommend to save as Quilt format.

Image Direction (From Left to Right)
Please check only if you apply reversed multiple images from others

LKG Parameter Setting
In default, you may not need to change settings if you has already calibrated. You can change if required


Quilt file will be generated by checking box Make Quilt image, and select multiple files then click Create with Selected files button, or click Create with All Files button.
You can save Quilt image : Menu ⇒ File ⇒ Save image..
Menu ⇒ Edit ⇒Looking Glass⇒ Conv. Quilt image opens Dialog box,
Hit OK button to display image on Looking Glass
Hit Enter to back SPM screen, hit Alt+Enter to view on Looking Glass
to go back to Quilt images, hit Ctrl+Z (undo)


Looking Glass file will be generated by selecting multiple files then click Create with Selected files button, or click Create with All Files button.
Hit Alt+Enter to display images on Looking Glass
Hit Enter key to go back to SPM screen
You can save image, Menu ⇒ File ⇒ Save image..
Jpeg is loose quality, we recommend PNG etc..

Sequencial image playback

Menu ⇒ File ⇒ Open simgle image, open Quilt image
Menu ⇒ Edit ⇒ Looking Glass ⇒ Conv. Quilt image, select Quilt style,
Hit OK button will display image on Looking Glass.
[Space], [Back Space] key will advance and back Quilt files within same Folder.