Ver1.50
Only iPhone15 Pro (Max)/iPad with LiDAR sensor + USB-C are supported, but
i have added a function to display the camera image in 3D on Looking Glass
connected to USB-C in real time using the depth information acquired by
the LiDAR sensor.
Lightning models cannot be displayed on the Looking Glass, because the
maximum resolution of the external display is Full HD (1920x1080).
To use Looking Glass, you must press the Setting button and enter the calibration
values in advance. The procedure is the same as for i3DMovieMaker, so please
refer to this page.
Connect the USB-C port to Looking Glass (if Looking Glass has HDMI input, please use a conversion cable or adapter), start the application, and then tap the LiDAR button (crescent moon icon) in the lower right corner of the screen to enter LiDAR depth mode.
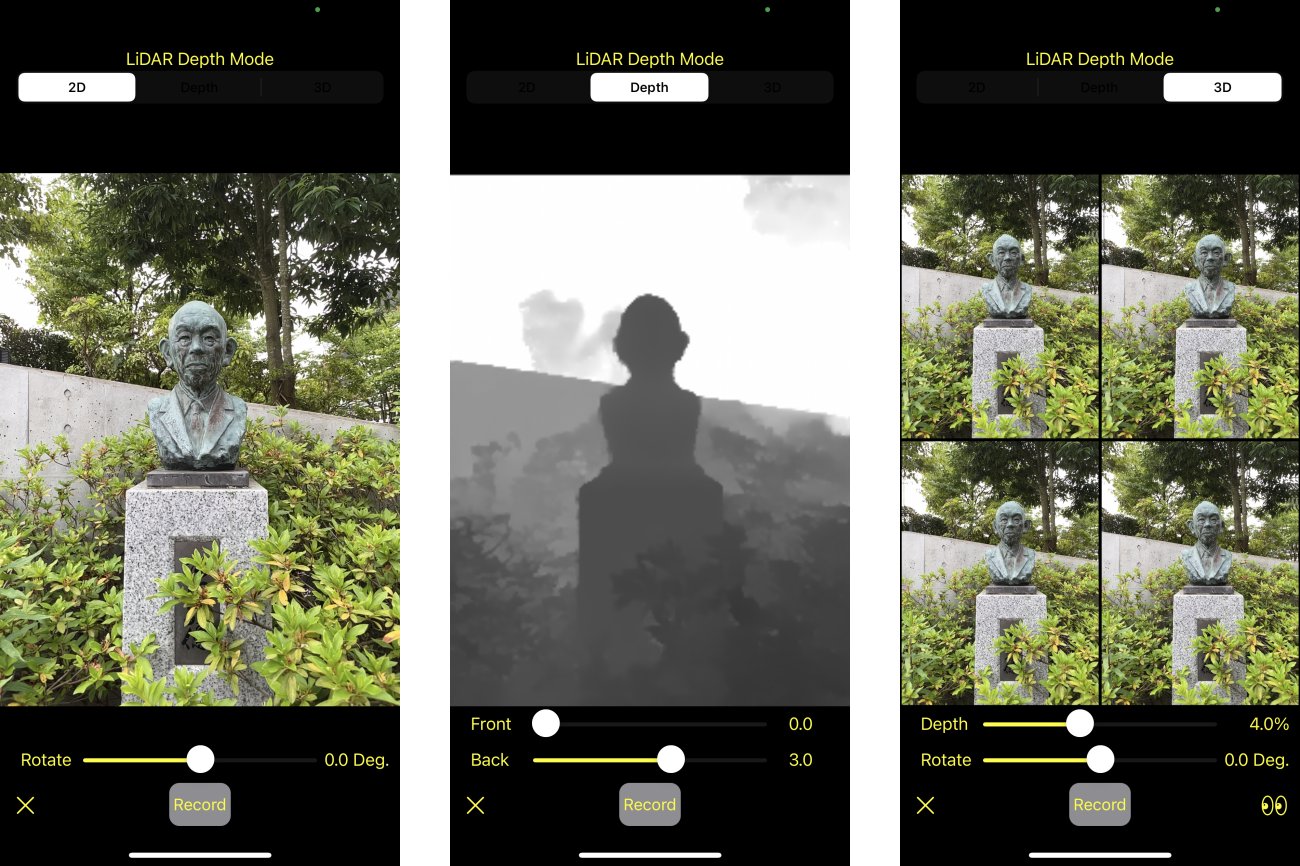
In LiDAR Depth Mode, press the rightmost 3D tab on the top tab to display
the camera image in 3D on the Looking Glass.
Press the Record button at the bottom center of the screen while the image
is displayed on the Looking Glass to record the Looking Glass image.

2D mode

Displays the RGB output of the camera.
The Rotate slider allows you to rotate the image from -90 deg. to +90 deg.
Tap the angle indicator on the right of the slider to reset it to 0 deg.
Tap Rotate on the left of the slider to start automatic 360 deg. rotation.
Tap again to return to 0 deg. and stop the rotation.
Tap the Record button to start recording, and tap it again to end recording. The recorded video will be stored in the Photos folder.
Depending on the setting, you can switch between recording RGB video and recording RGB and depth map with half SBS.
Tap "Camera FR/BK" to switch between front camera and back camera.
Tap "LiDAR" to switch to the screen for using depth with LiDAR if your model is equipped with LiDAR.
Tap "Setting" to display the settings screen, where you can make in-app purchases, get help, and switch between 2D and depth recording modes.
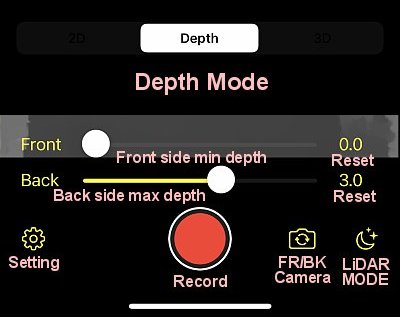
Depth mode

For supported models (cameras), a depth map created from the parallax of the dual cameras on the back will be displayed in real time.
Depth data can be obtained in numerical values of distance (m) from the camera, so you can set the slider to create a depth map from how many meters in front to how many meters at the back.
The depth map is created so that the black side is the foreground and the white is the background.
The slider can be adjusted in the range of 0 to 5 meters, but it seems to malfunction if the camera is too close.
The front camera, in particular, should turn black when it is close to the camera, but it malfunctions and turns white, so please keep an appropriate distance (about 50cm) away so that nearby objects do not turn white.
Normally, it is recommended to use the default setting of 0 to 3 meters. The adjustment value will be reset to the default value by tapping the adjustment value on the right of the slider.
Other than that, the operation is the same as in 2D mode.
3D mode

It displays 3D conversion in real time based on RGB and depth images.
In this mode, when you tap the screen, only the image will be displayed, making it easy to view 3D. Tap again to return to the original screen.
For normal 3D images, the distance between the cameras (stereo-based) determines the depth perception, but you can freely adjust the depth perception with the Depth slider.
Also, in the case of normal 3D images, if you rotate the image, it will no longer look 3D, but with this method, it will continue to look 3D even if you rotate it.
You can play around with the slider in various ways.
Tap Rotate to rotate the image automatically, and tap Adjust to reset to the default value.
Tap 3D Format Switch to switch between "LR/RL", "Anaglyph", and "HSBS".
If you save in HSBS format, you can convert it to other stereo formats in i3DMovieMaker.
To record in 3D mode, you need to pay in-app purchase, so tap the record button to open the in-app purchase screen.
If you tap on the screen and capture a screen with only the video displayed, you can record without paying, but if you like this app and want to support its development, please pay the in-app purchase.
Other than that, the operation is the same as in 2D mode.
LiDAR mode

On LiDAR-equipped devices (iPhone 12 Pro/Pro Max/iPad Pro 2020, etc.), tapping the LiDAR button will switch to the screen for using LiDAR-based depth as shown above.
Using LiDAR, you can get a better depth map and use a wider camera angle of view. (Depth using parallax uses the angle of view of a telephoto camera.)
The basic usage is the same as the normal parallax depth mode.
Tap the X button at the bottom left of the screen to return to normal parallax depth mode.