
The 'StereoPhotoViewer Applet' button provides a link to the author's webpage and, as a courtesy, should normally be included somewhere on the page.
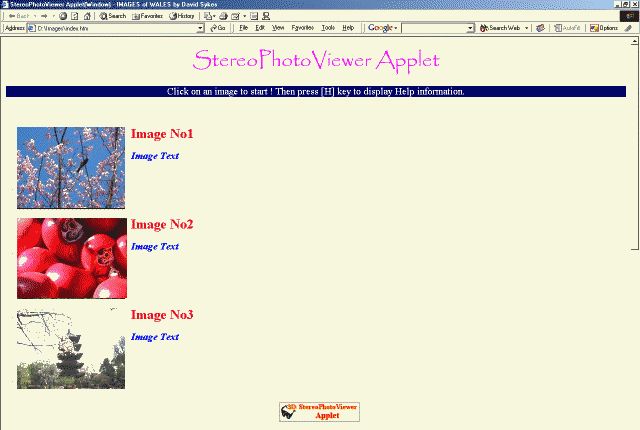
Click on any of the thumbnail images to (in this instance) popup the slideshow window and display the selected image in the format originally chosen.
Press the <H> key or <F1> key to display the Help information
for SPVA Window or Embedded version (popups must be enabled).
IMPORTANT: If you find the keyboard actions have no effect, click on the image first.

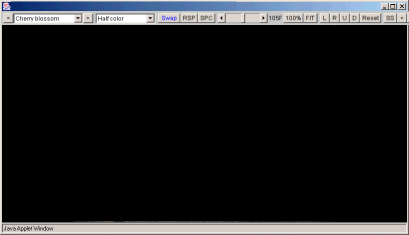
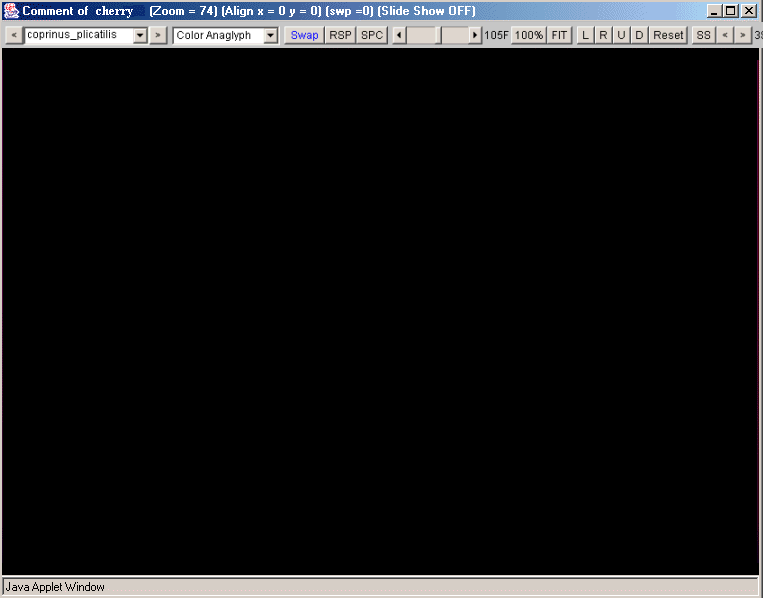
The title-bar shows :-

If there is more than one image in the slideshow, a drop-down menu listing the images is at the left of the menu-bar.
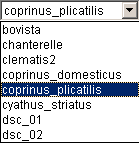
Left and right arrows to each side of the drop-down menu allow you to move up and down through the image-list.
The names used in the drop-down menu are those defined in the image-file list.
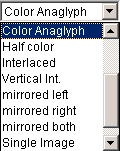
The stereo viewing method is chosen from the next drop-down menu.
For page-flipping with shutter-glasses, you must have Java3D installed and a system that supports quad-buffered OpenGL.

If a stereo image does not look 'quite right', try swapping left-for-right.
You may also use the 'X' key.
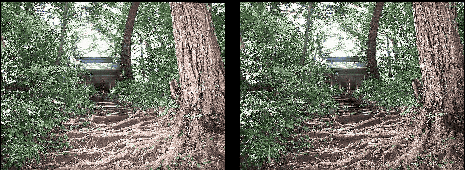
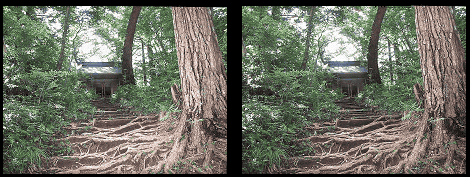
For a slideshow, all images should be either 'parallel-eyed' or 'cross-eyed', not a mixture of the two.

When zooming images, a simple resizing procedure can give the fastest response or a more complex procedure (Resampling) can give better quality.
Resampling OFF
Resampling ON
If your system or Internet connection is sufficiently fast, you may choose to leave Resampling ON permanently.
Otherwise you may prefer to turn it off for a faster response.
For non-zoomed side-by-side images, it is recommended that Resampling is ON.
When Resampling is ON, the toolbar 'RSP' icon will be colored blue.
If you turn resampling ON while the image is zoomed, there may be a slight delay before the image is updated.
Resampling does not apply to OpenGL page-flipping mode.

When side-by-side images are displayed, you may choose the spacing as 'Narrow', 'Medium' or 'Wide'by clicking 'SPC' or the 'E' key.
The toolbar 'SPC' icon changes color from blue to black to red to indicate narrow, medium or wide spacing.


Images may be zoomed using the mouse wheel.
If you do not have a wheel-mouse, use the horizontal slider to zoom.
Alternatively, you may use the F2/F3 or Up/Down arrow keys.
Once zoomed more than 100%, you may use mouse-drag to position the image.

Image may be displayed at its 'native' size of 100% (you may also press the 'J' key) or fitted to the window (you may also press the 'F' key).

Ideally, all images should previously have had any alignment errors corrected.
Nevertheless, the user may correct vertical errors (click U/D buttons or press Up/Down keys) or change stereo window position (click L/R buttons or press Left/Right keys).
The alignment changes may be cancelled by clicking 'Reset' button or pressing [Home] key.

The slideshow interval may be varied from 1 to 9 seconds by clicking the arrow buttons.
A value of '0' uses the default of 3 seconds.
Start/stop the slideshow by clicking 'SS' button or pressing 'A' key.
Do this when an image is not loading and check the status bar to see that the desired action has taken place.

Current version number of 'StereoPhotoViewer Applet' (SPVA)
Pressing the 'M' key turns the menu-bar On/Off and pressing the 'A' key opens a new window so that you can copy an image to your hard disk (right-click, 'Save Image as ..').
If you are using the popup-window version of the applet, press [Enter] key to maximise window or drag window corner with the mouse.
Close the window by pushing [Esc] key or clicking 'Close' button.
Finally, pressing the 'G' key takes you to the author's Homepage.
To summarise, you may :-