
Previously, existing stereo cards, such as classic stereo cards, were supported.
Now I have added the ability to create custom stereo cards that can be
freely customized, including card size.
1. Download the latest version of StereoPhoto Maker (Ver. 6.27 or later)
2. Open a stereo photo and select "Menu->File->Print Stereo
card" to display the Stereo Card Print Setup dialog box.
Select "Custom Card" from the card type selection box in the upper right corner, and the "Setting" button will appear to the right of it.
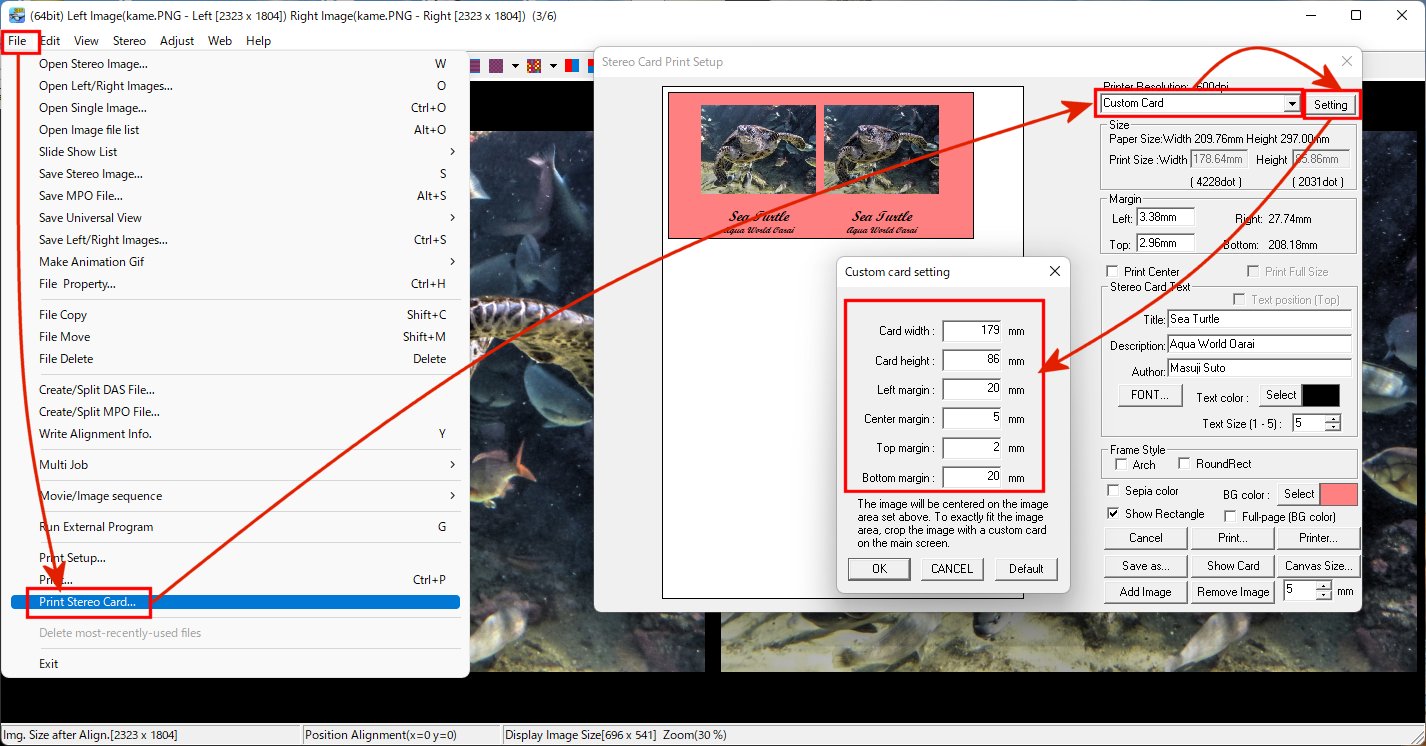
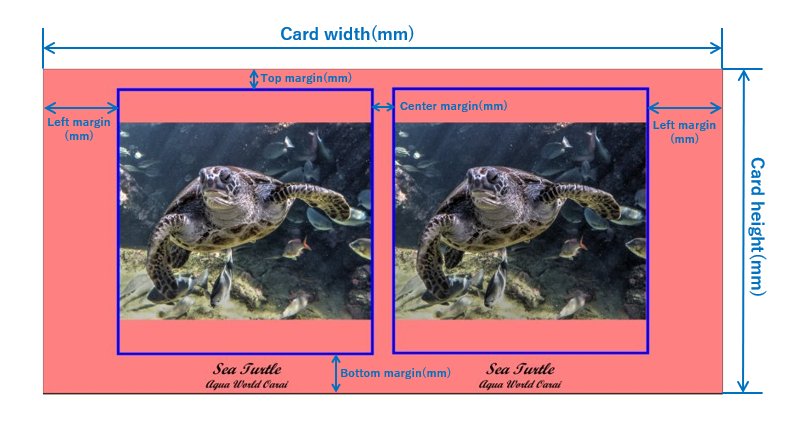
3. Set each value on the Custom Card Setting. The meaning of each value
is shown in the figure below.
The image area is the area inside the margins you set. If the image area
and aspect ratio (height/width ratio) do not match, the image will be printed
with centering.
4. If you want to use the entire image area, you must crop the original
image with the same aspect ratio as the image area.
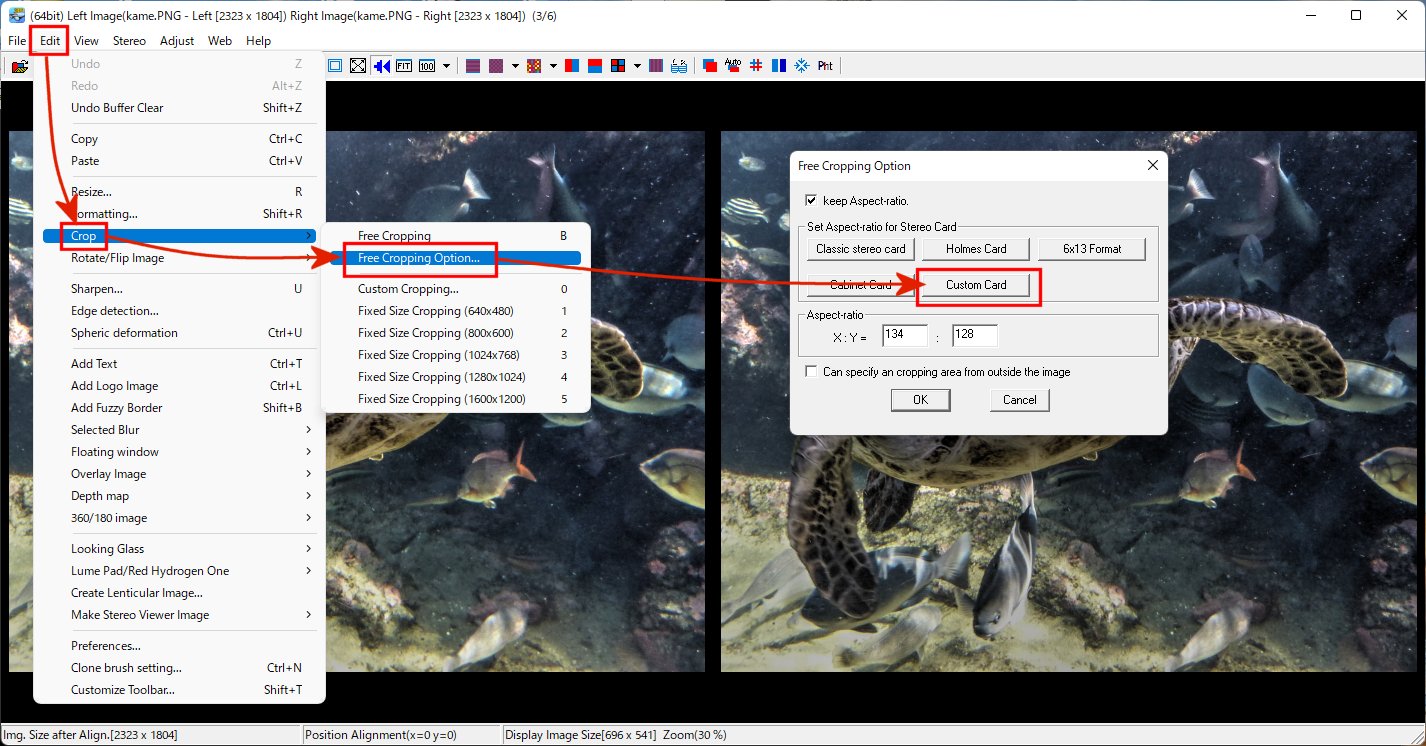
Press the Cancel button in the Stereo Card Print dialog to close it.
Press "Menu->Edit->Crop->Free Cropping Option..." (can
also be selected from the tool button) and press the "Custom Card"
button. The aspect ratio of the image area will be calculated based on
the value set in the custom card settings and automatically entered in
the aspect ratio, then press the "OK" button to crop the image
with the specified aspect ratio.
Then select "Menu->File->Print Stereo card" again to preview
the image so that it fits perfectly in the image area.
Changing the value of the custom card setting will change the aspect ratio of the image area, so this operation (custom card cropping) must be redone.
5. Read here to learn how to set up other stereo card printing dialogs.
Additional Information
- By pressing the "Add Image" button in the Stereo Card Print
dialog, you can place and print several different stereo cards on, for
example, A4 paper.
- Place the "Title" and "Description" text in the bottom
margin of the custom card settings. The text size is determined according
to the bottom margin, so the larger the margin, the larger the text size.
- Each custom card setting is maintained in the registry.
- Custom settings are specified as integer values in millimeters, but are
internally converted to inches for processing. This causes an error in
the finished card dimensions.