![]()
I introduced "Depth Map generation from 2D image by Google AI" on Windows, but there were many people who did not have a PC that can be run because the requirements of the PC are very high. I introduce the creation of depth maps from 2D images using "Google Colab" high-performance PC environment that can be run on a virtual WEB
provided by Google for free .
Basically, if you have a network connection and Google Chrome, it should work regardless of the PC's performance.
The program is a slight modification of MannequinChallenge (Github) published
by Google ( described later ) .
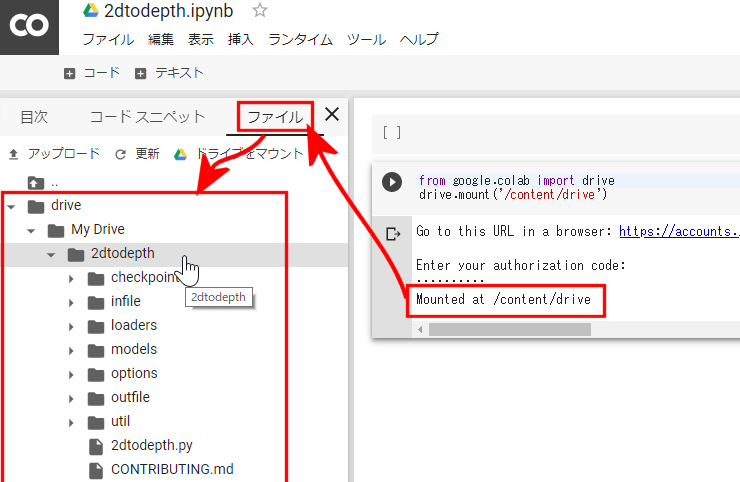
Operation image, create a powerful GPU equipped virtual notebook PC with
"Google Colab", mount "Google Drive" with the program written there , 2D image in the specified folder
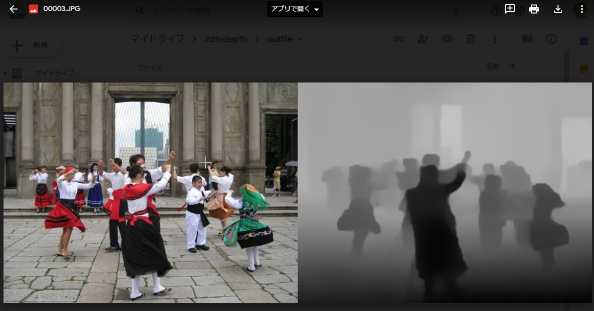
(infile) on "Google Drive" If you store (one or more) and run the program, 2D + depth map side-by-side
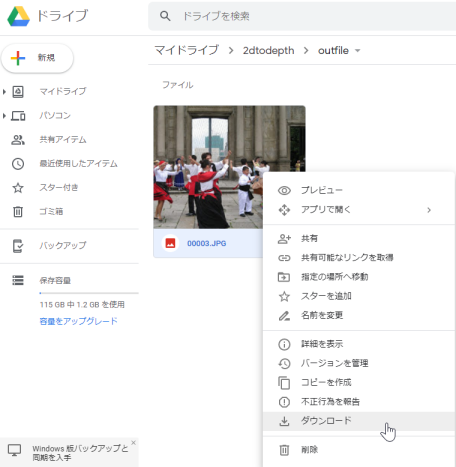
images will be output to the specified folder (outfile) on "Google Drive". After that, download it and use it as SPM etc. as Facebook 3D and
Looking Glass images.
In addition, since MannequinChallenge (Github) published by Google takes depth from the pose of a person called Mannequin
Challenge and learns, basically, please think it for people. Also, since
it is deep learning from about 2000 video data, I think that it is better
not to have excessive expectations for output.
At present, please think about how much depth you can do with AI, "try" level to try with various images.
1. Acquisition of Google Account
"Google Colab" and "Google Drive" need to log in with Google account. If you do not have a Google account, please get a Google account .
2. Download the following program, then extract it, finally drop and drag
2dtodepth" folder to "Google Drive".
2dtodepth_colab.zip
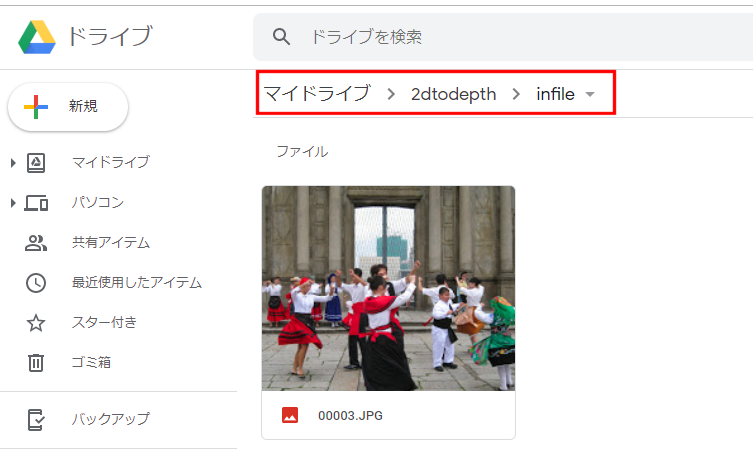
Please upload (drag and drop) 2D images in My Drive / 2dtodepth / infile folder
There is one sample image, so please delete it if you don't need it.
Note that if you put files other than Jpeg files in this folder, you will get an error and stop processing, so please put only Jpeg files.
3. "Google Colab" setting
3-1, Open "Google Colab" page, select the File -> New Python 3 notebook
in the top left of the menu, to create a virtual PC
3-2 If you want to change the virtual PC's name to something more descriptive. Select File -> Rename in the menu.
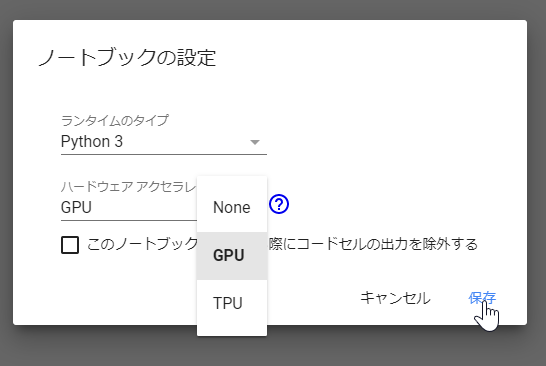
3-3 Select Edit -> Notebook Setting in the menu, and set the hardware acceleration of the displayed dialog to "GPU"
3-4 Mount "Google Drive" on a virtual PC
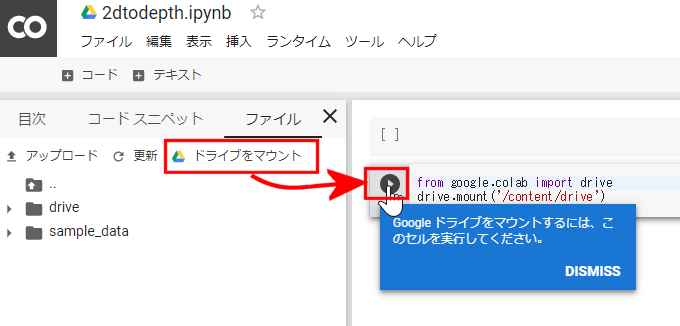
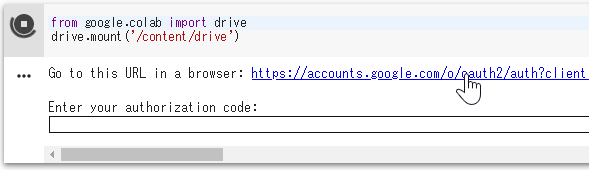
Click on the specified URL and allow access like this Screen, the code will be displayed, copy it , paste it into the above dialog, press the Enter key. You can find ' Google Drive' in drive.
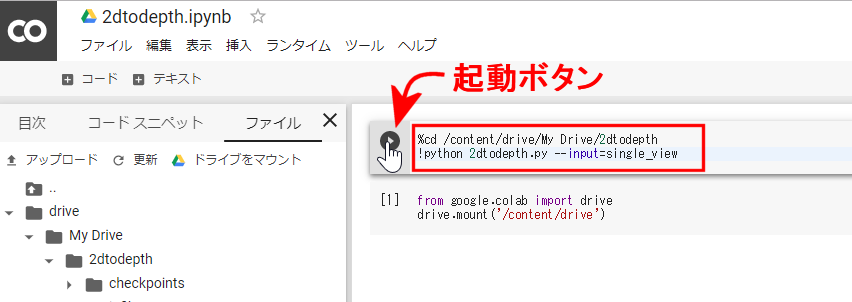
3-5 Enter the following command and press the execute button to start the Python program.
%cd /content/drive/My Drive/2dtodepth <--- Move to programme folder
!python 2dtodepth.py --input=single_view <--- Run python programme
3-6 Wait until the end of execution as below
Input ---> Output is displayed and display is finished.
If you enter multiple images, it will finish if it is all displayed.

Download the created files from My Drive/2dtodepth/outfile folder.
3-6 Use created files with StereoPhoto Maker etc.
Mods from original MannequinChallenge (Github) published by Google
-You can create a batch depth in the folder, it is supposed to create a file list, but it is troublesome to make a list one by one.
- Maintain the original resolution / aspect of the input image.
Original Code create always 512x288 pixels iamges.
- Fixed problem if jpeg file have more than one images.
- Added autorotation with EXIF info.
-Can specify the direction of the depth map (white front / black front)
etc.