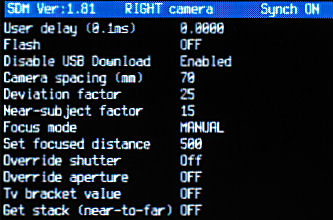
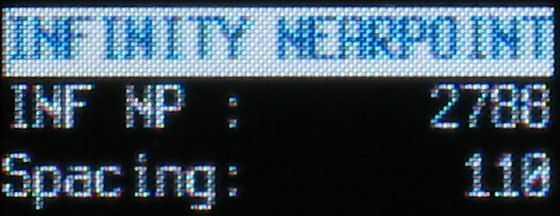
Simply zoom to any setting to see what nearpoint will produce your maximum-acceptable deviation when the image also includes infinity.
The calculation is based on sensor size, zoom-setting, camera-spacing and maximum-deviation as a fraction of image-width.
With a vertical camera, the acceptable deviation will therefore be smaller as the image-width is now smaller.
SYNCHRONISED ZOOMING
This works on cameras that have a single zoom lever or switch.
In the Stereo menu, you can enable or disable this option and also set a timeout value of two to ten seconds.
(Remember, you need time to operate the zoom switch on both cameras).
If the remote switch has not been pressed by the timeout time, synchronised-zoom mode will terminate.
To enter synchronised-zoom mode, quickly move the zoom lever to wide-angle or telephoto setting and release.
The blue LED will light and in this mode you can use the remote switch to zoom.
Quickly press-and-release the switch to move one zoom step.
When the zoom limit is reached, the zoom direction will reverse.
(a zoom-step is an SDM-defined value that for some cameras is the same as the Canon zoom step but for other cameras, that could have 125 native steps, it is derived from a suitably-spaced selection).
Moving the zoom lever more slowly enables normal zoom operation.
To exit zoom mode, half-press the camera shutter, half-press the Ricoh switch or let it time-out.
You cannot use the <ALT> button until you have exited zoom mode.
Used correctly, this is a useful feature and you should avoid the temptation to manually press the zoom, there is no need and it will only lead to frustration.
Ensure that your switch battery has not discharged to a marginal value that zooms one lens but not the other.
BROWSING IMAGES
In playback mode, press and release the remote switch to synchronously-browse the pair of images on the two cameras.
Use the left/right arrows to change direction.
With some rigs, you may be able to free-view the image-pair in stereo.
Another possibility, when travelling long distances or for an important assignment, is to connect the video-outputs to a pair of TFT Tv's and power from the cigarette lighter in your vehicle.
CANON
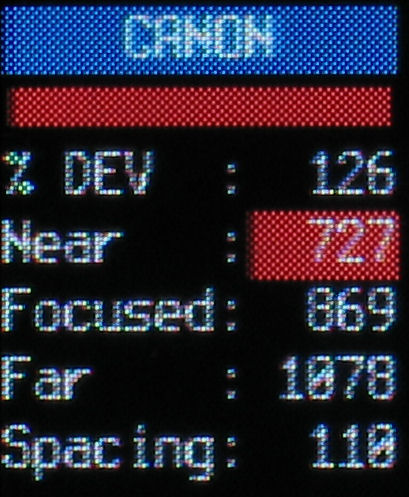
This is an indication of deviation when you are focused on a particular subject distance and the near and far points are at the depth-of-field limits for the aperture used.
Zoom the lens to maximum telephoto position and autofocus on the principal subject in the scene.
With the shutter still half-pressed, press the DISPLAY button and you will see 'Focused' updated with the measured distance.
As you zoom, the deviation will alter and be indicated on the bargraph, coloured red if beyond your maximum acceptable.
Changing the aperture will change the near and far points and therefore the deviation if they are also the photos near and far points.
RANGEFINDER AUTO
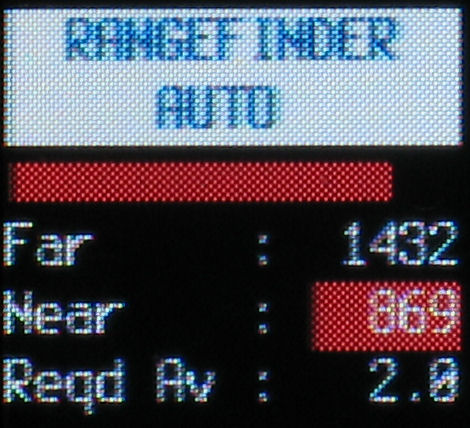
Used to measure the scenes near and far distances.
Zoom the lens to maximum telephoto position and autofocus on the nearest part of the scene.
With the shutter still half-pressed, press the DISPLAY button and you will see 'Near' updated with the measured distance.
Autofocus on the farthest part of the scene and with shutter half-pressed press the MENU button.
'Far' will be updated with the measured value.
The aperture required to get that scene-depth in focus will be displayed.
It is a numerical value that may be beyond your camera's physical aperture.
The bargraph indicates in the usual way the deviation produced by those near and far distances and changes as you zoom.
RANGEFINDER MANUAL
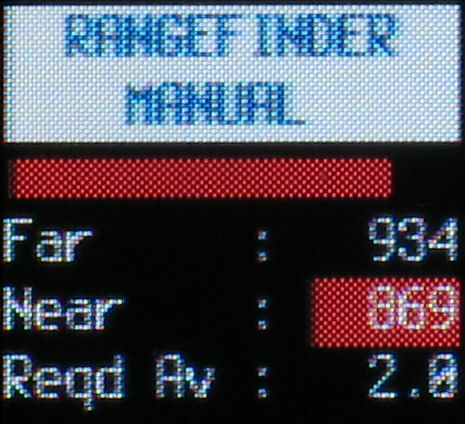
This is similar to 'Rangefinder Auto' except that you measure and manually-enter the near and far distances.
Measure from the front of the lens and enter in 'Stereo Parameters' 'Set focused distance' and 'Far-distance manual value'.
RANGEFINDER
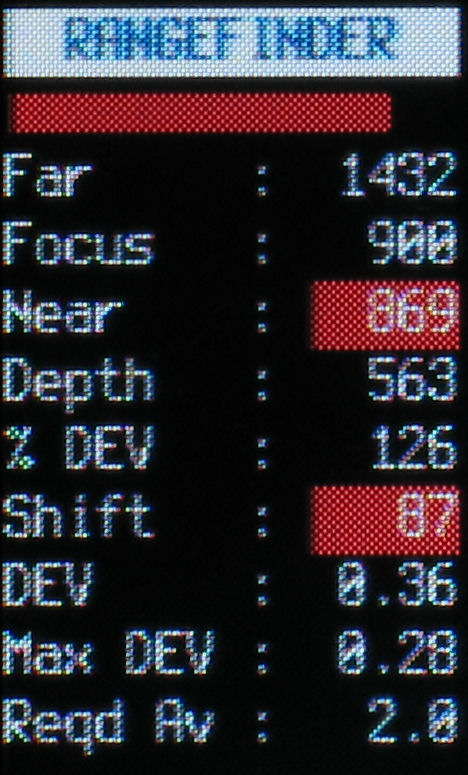
This is similar to 'Rangefinder Auto' but provides additional information.
The near and far distances are measured at maximum-zoom setting and entered with DISPLAY and MENU keys while half-pressing shutter.
The optimum focus distance is displayed and may be moved to in <ALT> mode by pressing FuncSet.
The required-aperture to capture the scene-depth is indicated together with actual deviation (in mm) and your current maximum-acceptable deviation .
To capture that scene-depth with a single camera to produce maximum-deviation required the 'Shift' value indicated.
Shift Auto
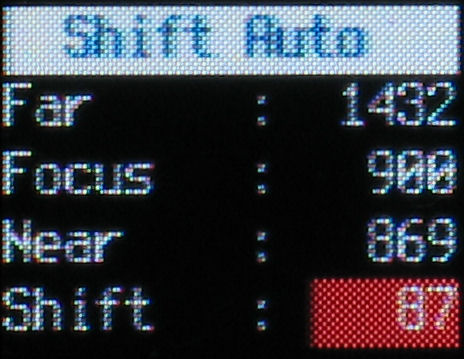
This tells you how far to move a single camera to produce your maximum-acceptable deviation for a given scene depth.
Zoom the lens to maximum telephoto position and autofocus on the nearest part of the scene.
With the shutter still half-pressed, press the DISPLAY button and you will see 'Near' updated with the measured distance.
Autofocus on the farthest part of the scene and with shutter half-pressed press the MENU button.
'Far' will be updated with the measured value and 'MAN' should be displayed on the left to indicate manually-set-distance focusing mode.
(in this case the distance has been calculated and entered automatically).
'Focus' is the calculated distance that will give optimum depth-of-field.
Note that focus override is not available for some cameras.
As you zoom, the required shift will be displayed and will be coloured red if too great a fraction of near-distance.
That fraction is the 'Nearest subject factor' in the 'Stereo Parameters' menu.
Shift Manual
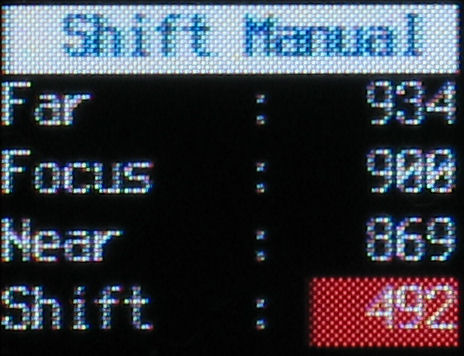
This is similar to 'Shift Auto' except that you measure and manually-enter the near and far distances.
Measure from the front of the lens and enter in 'Stereo Parameters' 'Set focused distance' and 'Far-distance manual value'.
('Set focused distance' is named that way because it is also used for other functions).
FOCUS TEST

For those wanting to test the accuracy of the camera's distance measurement, this OSD displays distance to subject from the front of the lens and also from the sensor.
Zoom the lens to maximum telephoto position and autofocus on the nearest part of the scene.
With the shutter still half-pressed, press the DISPLAY button and you will see 'Near' updated with the measured distance.
Displaying XML file data
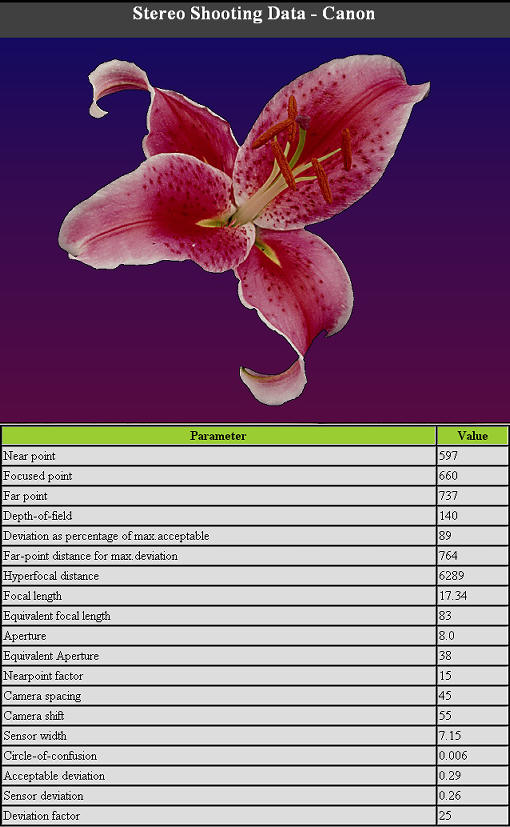
When
you open the XML file associated with an image with InternetExplorer,
the display will be similar to that on the left.
In this case, the
camera was 660mm from the subject and the DOF was from 597 to
737mm.
A camera separation (or movement) of 45mm gave 89% of our
maximum acceptable deviation with those near and far
distances.
Maximum-acceptable deviation occurred at 764mm,
slightly beyond the DOF limit.
Of course, what is in-focus or
out-of-focus and by how much is subjective.
Visible on the camera
display was indication that the nearest point in-focus was too near
(at less than 15 x 45 mm).
We used the equivalent of an 83mm lens
at the very small equivalent aperture of F38.
If you are
skilled with XSL, you can provide your own file to display the
information how you want.
After auto-correction with SPM, you
may like to change the link in the XML file to point to a grey
anaglyph, for example, of your corrected image.